
Here, I shall continue sharing with you all the progress of the garden as well. The first couple days of our workshops were dedicated to building the beds. The Prefectura came in and helped us with this, building the first bed as a model, and then the rest was up to the group.

It was a collaborative effort, with women from INFA; doctors from the health center; the guys from the Prefectura; and community members all pitching in.
Earlier that morning, Mike and I picked up the materials we would need: caña (bamboo) and cuartones (square wooden beams).

We paid $2 to have a guy load them onto his bike cart and wheel them the few blocks to the Casita de Chocolate. It was a wild ride.
And now, a quick tutorial on building raised beds out of caña:
Step 1: Split the caña.

You have to start with an axe, but once you get it going it splits easily enough and you can just use your hands to pull it apart.

Each caña yielded 4-5 slats (enough for roughly half a bed) of the size we needed for our beds.
Step 2: Smooth out the caña with a machete.

Step 3: Saw the cuartón.
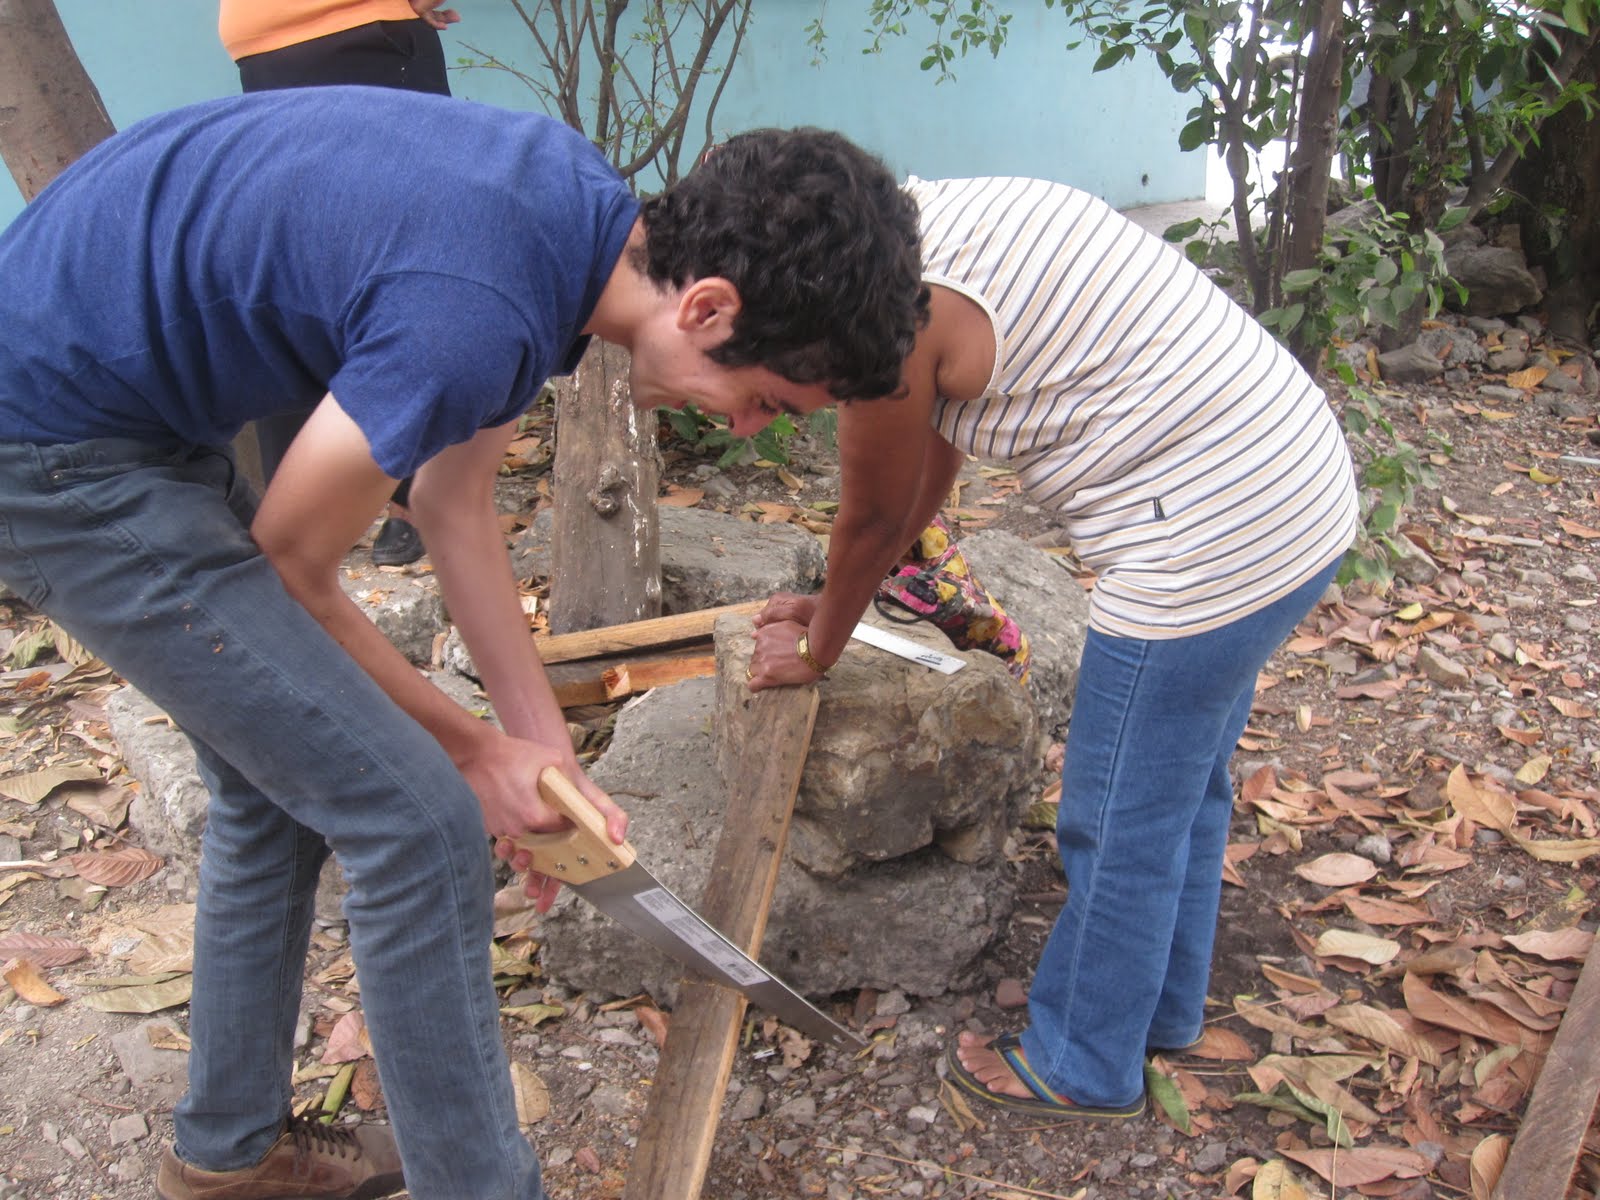
These pieces will be used to form the corners of the beds. Get 'em, Mike!
Oh - and you'll also need to saw some of the caña to form the shorter sides of the beds.

Measurements and muscles were involved here; I was not. Sawing caña is a lot harder than it looks. The stuff is stronger than wood! (Well, it felt like it, anyway.) I stood back and embraced my role as photographer at this point in the process.
Step 4: Hack the cuartón into stakes.

Again, these will be used for the corners of the beds, and they need to be pointy to go into the ground easier. ("Pointy" and "go into the ground" - these are very technical terms.)

Doctora Murrillo has been an integral part of our garden project from Day 1. Without her help, we wouldn't have the number of participants we have. She motivates people by wielding a machete and wearing a smile! - er, that is, she motivates people by leading by example.
Step 5: Stick the stakes in the ground.

There is a method to this, and it involves more measurements to make sure you put the stakes into the ground in a straight line, which comes in handy when you want a rectangular bed. It also involves the use of a very heavy metal pole that must be repeatedly driven into the ground to create a hole deep enough for the stake. Our soil was very rocky, so we also poured water into the half-finished holes to soften it up.
Once the stake is in, you fill in the soil and pound away at it with whatever's handy.

Another stake, say.

Or a mini sledgehammer.
Step 6: Nail the caña to the cuartón.

This is also harder than it looks; again, caña is hard.

In addition to the stakes anchoring the corners of the beds, we put some at the midpoint of the long sides to keep the caña from bowing outwards once the bed is filled with soil. We're smart like that.

And before you know it...
...Lo and behold, you've got a bed.

And in our case, a Mike. (Note: In Spanish, the word for "bed" as in a garden bed and "bed" as in where a person sleeps is one and the same, just as in English. I just wanted to share that with you and tell you to have no fear, Mike's little pun translates well. Moving on.)
For more beds, go back to Step 1 and repeat the process. Or, if you want to get fancy, you can multitask and do a teamwork approach to construct multiple beds at once. This is what we did over the course of three different bed-building sessions. At the end, it looked like this:

The beds are not perfect; they haven't been leveled, for instance. But at the end of the day, once they're filled with soil and tended to with diligence and affection, they shall serve their purpose. That'll do, Pig; that'll do.
No comments:
Post a Comment
Note: Only a member of this blog may post a comment.